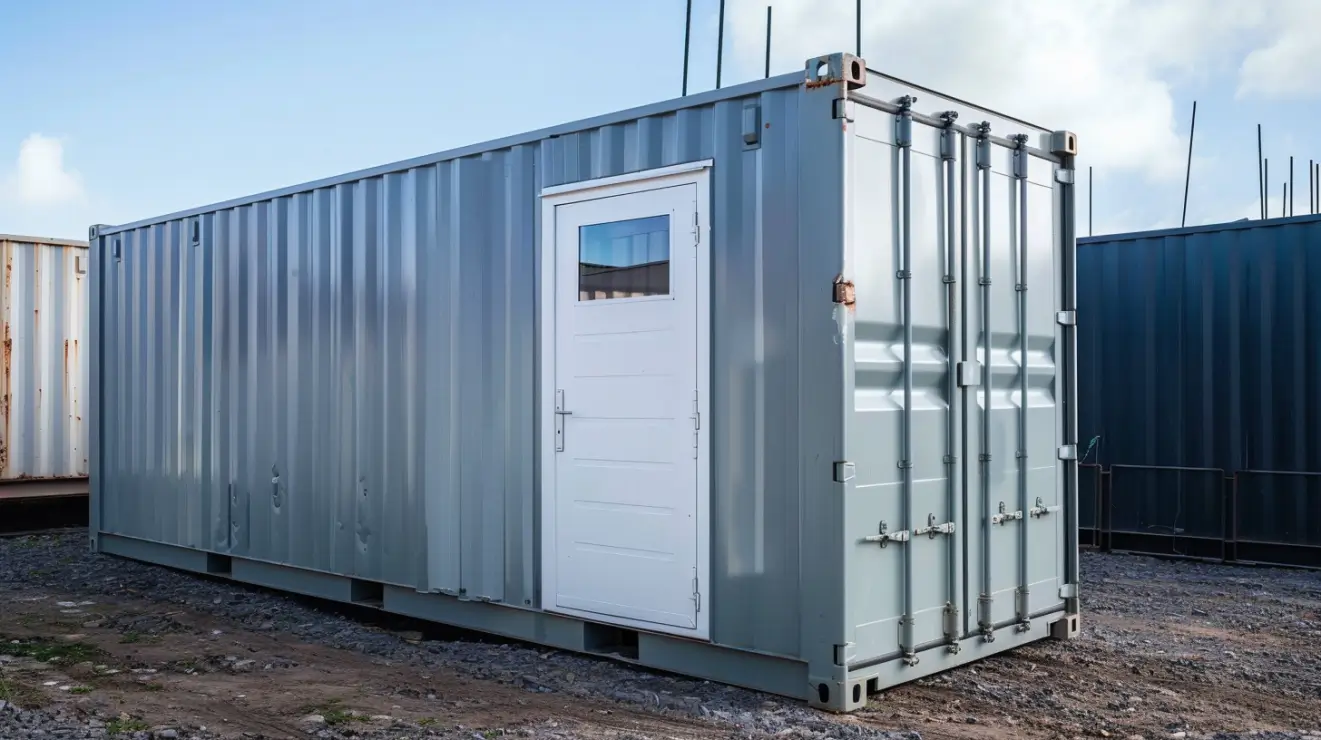
As an architectural trend, shipping containers are now among the most innovative. In recent years, the adaptability of shipping containers has seen these steel structures take on a plethora of new life forms, from storage and workshops to offices and living spaces.
However, since their original purpose was simply to transport goods, the naturally dark interior of shipping containers makes them unsuitable for many uses without modification. Installing windows in a shipping container is an excellent way to turn a steel box into a modern and versatile space.
Types of shipping container windows
When modifying a shipping container, there are several different types of windows that can be installed. It all depends on how you plan to use your unit. For example, you might choose large windows to let in natural light for shipping container homes or smaller windows to elevate a commercial space securely.
It’s not just the size that matters when it comes to deciding which windows to install in your shipping container. You’ll also need to consider the type and shape based on how the container will be used. This might include the need for extra security, improved airflow, or simply a better-looking container. Options range from fixed rectangular windows to louvred square styles and more
Fixed windows
Fixed windows in shipping containers do not open and are primarily installed to allow natural light into the container without compromising security. Many people use these types of windows in shipping container conversions, whether it’s a site office, retail unit, or living space. They’re commonly installed alongside other window types to add some variety to the space.
Installing fixed windows can be a great way to introduce natural light into a shipping container. They also offer better energy efficiency, but their fixed nature doesn’t allow for ventilation or natural airflow.
Sliding windows
If you’re keen to add fresh airflow into your container without taking up precious space when opening, sliding shipping container windows are a great option. This type of window is commonly used across a variety of container conversions, improving comfort, ventilation, and the container’s aesthetic while maintaining a level of security.
Casement windows
Casement windows open outwards, just like a door, so they don’t take up too much interior space but still create a large opening for fresh air. This balance of ventilation and security is ideal for shipping container conversions of any kind, and they’re quite easy to install and maintain, too.
This type of window can be opened fully to maximise airflow on a hot day while allowing plenty of natural light to enter your unit. Typically, casement windows are a little more secure than sliding windows because locks are embedded directly into the frames.
Louvred windows
Louvred windows allow you to regulate airflow and light penetration into your shipping container with a series of horizontal blades, similar to louvred vents. The blades are often made from glass, timber, or aluminium and are fixed between the frame, giving you protection against sunlight, rainwater, and noise intrusion when needed.
If your space requires a little more ventilation, louvred windows are a good choice. With the movable blades, you can easily control how much air enters the container, as well as light penetration. For extra protection, comfort, and security, louvred windows can be locked into position and combined with insect or security screens.
Awning windows
Awning windows are installed slightly differently from conventional windows, with a hinge at the top allowing the window to open from the bottom. This creates a canopy effect where the window can be left open without letting rain enter the space – perfect for muggy days where air is needed but rain is falling.
The combination of natural light and ventilation with security makes these windows a popular choice for many container conversions. In most cases, awning windows are installed higher on the container wall for added privacy and security. They can also be combined with anti-vandal shutters for additional safety.
Privacy windows
Depending on the use case of your shipping container, it may be necessary to create natural light but still maintain a level of privacy. Privacy windows are the solution for this, maximising light while ensuring privacy concerns are considered. They are typically positioned closer to the top of the shipping container.
Security bar windows
In their original format, shipping containers are naturally secure. But once you install windows, the security is compromised. To mitigate against this, security bar windows can be installed to secure your unit against theft, tampering, and vandalism. Security bar windows can also improve the safety and comfort of people working inside the container, not just its contents, when you’re not around.
Double-hung windows
Double-hung windows have two openings, enabling them to slide up and down. They have become a popular choice for both living spaces and offices. Double-hung windows are a flexible option since the bottom sash can be slid up and the top sash down. This means you can open just the bottom, just the top, or both ends at once.
How to choose the right style of window
With several options available, it’s not always easy to choose the right style for your shipping container. Choosing the type is just one element of your decision, as you’ll also need to determine which size would be best – whether it’s standard or custom. You may also want to consider alternatives like skylights and concession windows, depending on your use case.
To help you choose the right window for your shipping container, consider your lighting, ventilation, security, and budget needs. Then, mull over the various options and determine specific elements of the window types you like, including durability, ease of installation, and how well they complement the container’s overall design and functionality.
If you’re simply looking for some natural light filtration and have no ventilation needs, a fixed window could be a suitable and budget-friendly option. However, if ventilation is a top priority and natural light is secondary, a louvre window might be a better fit. For a living space or shipping container home, casement, sliding, and double-hung windows provide ventilation, natural light, and aesthetic appeal, so they’re great all-rounders.
Best window materials for shipping containers
Choosing materials that withstand the elements is a key consideration when installing shipping container windows. Whatever you’re using your container for, it’s going to be outside, so strong materials are a must. Durable and low-maintenance materials like vinyl, aluminium and steel are popular choices for shipping container window frames.
Polycarbonate and uPVC have also become common frame types in shipping container living spaces. Polycarbonate is strong and offers additional safety features, while uPVC windows are often double-glazed, so they provide good levels of insulation and ventilation. Whichever window material you choose, double-paned glass is a must. This can improve both insulation properties and energy efficiency.
If you have a smaller container or you don’t want large windows to take up too much room, it could be better to opt for a personnel door with some glazing. This will give you natural light without compromising wall space in your unit.
Shipping container window installation methods
There are two main methods to install windows in a shipping container:
- Do-It-Yourself (DIY)
- Employ a container modification specialist
Many companies specialise in shipping container modifications, which can make the process much smoother and ensure you have a quality result. However, if you’re tight on budget, this is the more expensive option.
DIY installation is cheaper but can be difficult and time-consuming. It also requires technical skills, which, if you don’t have, can be dangerous when you start using tools.
Tools and materials needed to install windows in a shipping container
Before you start installing a window in your shipping container, there are tools, equipment, and materials you’ll need. To create the window opening in the container, you’ll need cutting tools, and to secure and seal the window, you’ll need screws, rivets, bolts, and caulk or sealant.
Here’s a checklist of the tools and equipment you’ll need:
- Angle grinder (minimum 4.5″) with metal-cutting discs for smooth cuts
- Jigsaw or reciprocating saw equipped with bi-metal blades
- Digital level
- Metal square
- Measuring tape
- Metal marking pencils
- Drill and metal drill bits (for drilling through steel)
- Steel frame or other type of chosen window frame
- Window
- Appropriate screws, rivets, bolts, and fasteners
- MIG welder for securing the frame
- Spark-resistant vacuum to handle debris
- Silicone sealant (for waterproofing)
- Sealant gun for applying weatherproofing materials
- Safety Gear (gloves, safety glasses, ear protection, and steel-toe boots)
Steps for installing windows in a shipping container
If you’re ready to get started on installing windows in your shipping container, there are several steps you need to follow.
1. Prepare the area
A clean and safe workspace is essential for accurate installation. You shouldn’t start any work until the area has been prepared. First, ensure all hazards are removed from the working area, including unnecessary equipment, furniture, overgrown plants, or anything else that could cause a hazard. Next, try to control environmental factors in the area to ensure optimal working conditions.
Depending on your setup and working area, some other preparation tips include:
- Set up industrial exhaust fans to create negative air pressure
- Use a spark-resistant vacuum to maintain tidiness and adhere to safety protocols
- Use HEPA-filtered vacuums to maintain clean air
- Place fire extinguishers within 25 feet of the work area
- Install high-heat-rated welding screens to protect against sparks
- For temperatures below 10°C, preheat the workspace
- For humidity over 60%, use dehumidifiers
- Consider UV exposure and mark areas with UV-resistant markers
2. Prepare the shipping container
As well as your workspace, you need to prepare the shipping container for window installation. Make sure your container is situated on level ground so it won’t shift or cause harm when you get started.
Next, measure and mark the window location on the container, considering the window’s size, sun exposure, privacy, ventilation, and aesthetics.

It’s important to use the window templates provided by the manufacturer when setting out to ensure they match the frame specifications. When choosing a space for your window, verify that your cutting area is not structurally critical, for example, on any seams or corners. If you’re unsure, consult a professional.
When you’re happy with the placement of your window, you can drill pilot holes at the corners using ⅜” cobalt steel hole saw bits. This will make it easier for you to cut the window opening.
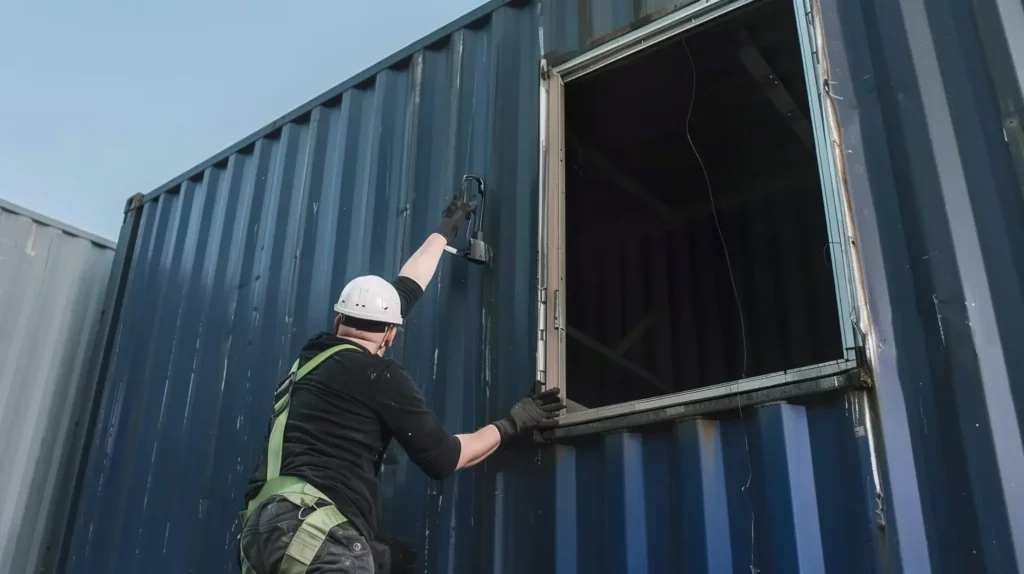
3. Cut the opening

Before you start cutting, use a laser level to ensure your measurements are accurate and perfectly aligned. You don’t want to start cutting and risk installing a wonky window! Then, use a jigsaw or reciprocating saw to cut along your marked lines from each of your pilot holes. You must cut slowly to ensure a straight, clean cut.
Once you’ve cut the opening, you may need to use an angle grinder to achieve a smooth finish. This will also avoid any potential injuries for people working around the window.
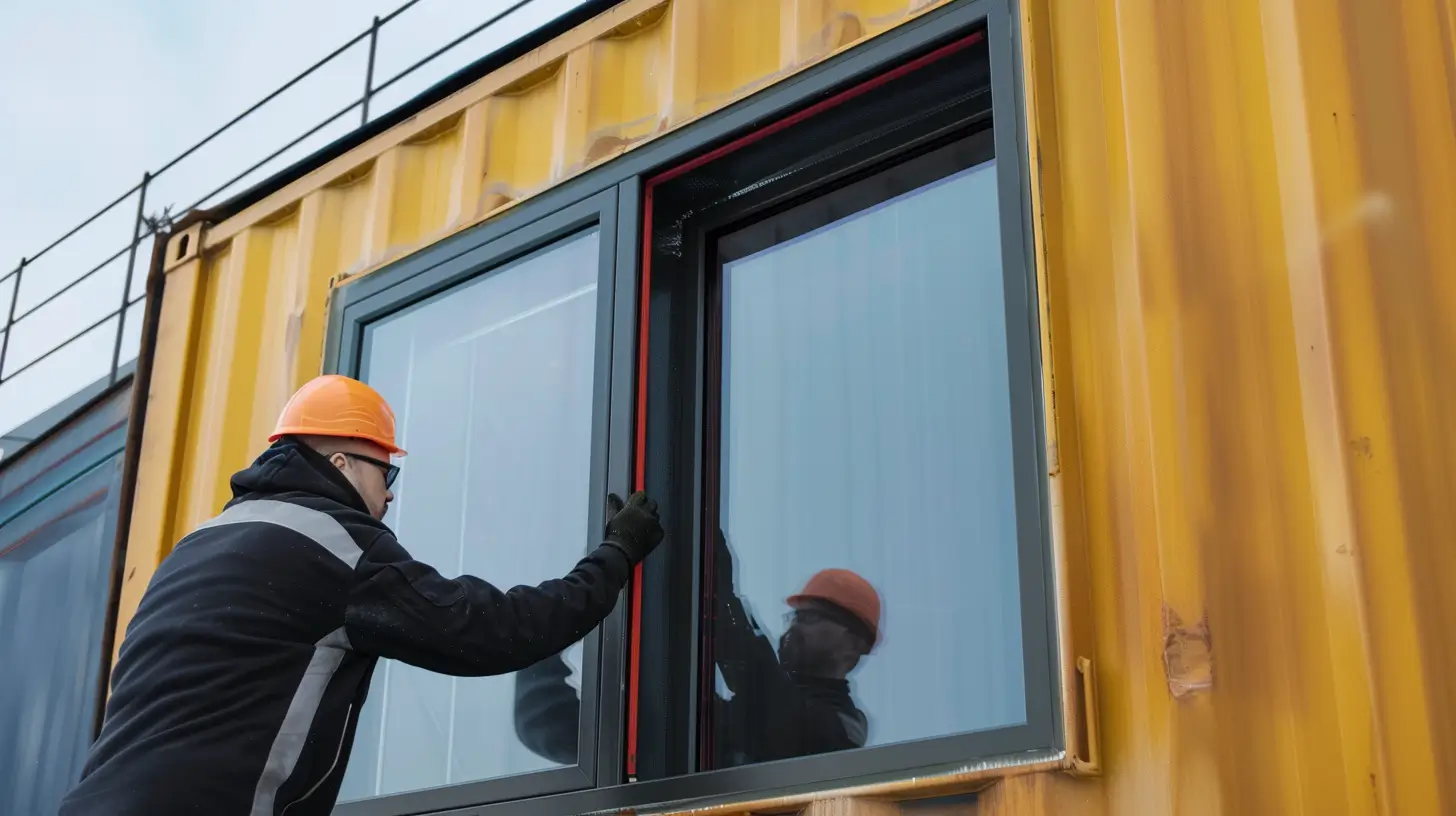
4. Install the frame
If you’re creating your own window frame, you’ll need to build it. To do this, we suggest using a 2×4” steel tube or the same size in wood to cut out the frame. This will accommodate the window. As a guide, the length of tube or wood you will need is around the same width as your window. Likewise, you’ll need to cut a piece equal to the length of the window.
Remember, you’ll need two pieces for the width of your window, and two for the length. Ensure your measurements and cuts are accurate so you don’t cut them too short for the window opening. Once you have four pieces of tube or wood, you can screw or nail them together to form the window frame.
If you’re using a pre-built frame, you should install it as per the manufacturer’s guidelines. This includes screwing it in with the appropriate screws or bolts or welding it together.
Next, position the frame in the window opening and use clamps to hold it in place so you can check its alignment. If you can, and want additional stability for your window, weld the frame into the opening. Once your frame is secure, weatherproof it by applying silicone sealant around the edges.
5. Mount and seal the window
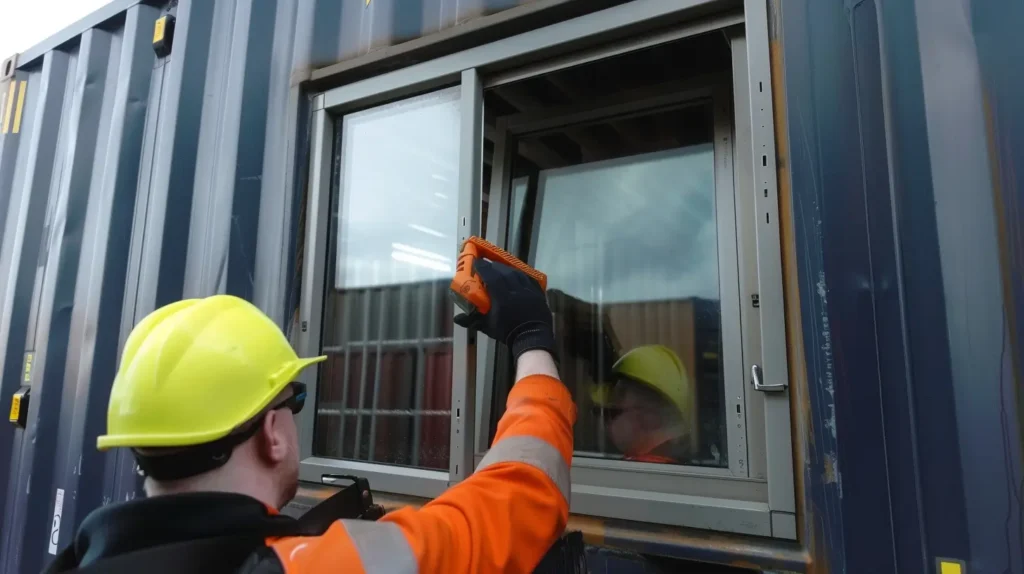
With your frame securely in place, you can slide your window into it. Be sure to check its level, aligned, and fits snugly within the frame with minimal air gaps. During this step, don’t apply too much pressure to the glass, as it could break or shatter. When the window is in place, you can seal the edges with marine-grade silicone.
For extra insulation, you can leave a 3mm gap for expansion and fill it with flexible polyurethane sealant. Finally, close small openings or potentially leaky areas with a layer of caulk.
6. Test the window
The final step of the installation process is to test your window by opening and closing it to ensure it works correctly. For sliding windows, test the sliding mechanism to make sure it moves smoothly. If you’ve chosen a louvred window, be sure to check the mechanism works correctly, opening and closing in a smooth motion.
You should also carry out a water test with a pressure washer to check for leaks, and an air test to detect any gaps around the edges of your window. You can use a smoke pencil to do this. Finally, apply moderate pressure to the window to check its stability. Your window should remain firmly in place without any movement.
7. Regularly maintain the window
Shipping container window installation is one element, but you should also regularly maintain it to ensure longevity and proper functionality. Examine your window to check it’s working correctly and assess whether any shipping container maintenance is needed. Twice per year, in Spring and Autumn, should be sufficient as part of a maintenance process. You should also aim to do a more thorough check once per year.
As part of your regular maintenance checks, there are several things you should be looking at and testing, including:
- Examining the sealant for cracks
- Checking window alignment
- Applying silicone spray to lubricate moving parts
- Using a stiff brush to clear out drainage holes
- Using thermal imaging to identify insulation gaps
- Cleaning and inspecting drainage weep holes, adding 0.5mm stainless steel mesh filters if needed
Faulty sealant can be a cause of damp in shipping containers, so you must check this and protect your unit from condensation. As a guide, replace sealants every 3–5 years and gaskets every 5–7 years if they have been used.
Looking for the perfect shipping container?
Check out or wide range of new and used shipping containers for sale today!
View shipping containersDIY vs professional window installation
Both DIY and professional window installation have their advantages and disadvantages. For example, DIY allows you to save money, but it can be more complex and cost more time. Professional installation can be costly, but you know it will be done correctly and quickly.
Cost is often the biggest factor when deciding to go it alone or use a professional. Typically, professional installation costs more upfront, but if you are DIYing, costs can add up if you need to buy extra tools and equipment. Plus, if you install your window incorrectly, rectification could be even more costly.
If you’re unsure whether DIY or professional modification is the right method for you, our friendly team can help advise you on your options.
The bottom line
One of the most impactful upgrades you can make to a shipping container is to install windows, whether you’re using it as a home, office, or workshop. The addition of natural light and ventilation can significantly improve comfort, convenience, and the aesthetic of your shipping container. But you’ve got to get it right.
While our guide provides helpful tips for successful shipping container window installation, it’s always worth speaking to an expert for any specific advice you may need. Our team is on hand to offer guidance on shipping container modifications, from helping you choose the right windows to installing the windows for you.
FAQs
Why install windows in a shipping container?
There are many reasons for installing a window in a shipping container, including adding natural light, reducing reliance on artificial lighting, and creating a more comfortable atmosphere. Windows also improve ventilation and airflow, preventing heat and humidity buildup.
Adding windows to a shipping container can enhance its aesthetic appeal, too, creating a connection to the outdoors and reducing isolation when inside. Additionally, shipping containers with windows have a greater market value should you wish to sell later on.
How do windows impact insulation and climate control?
Windows can significantly impact both insulation and climate control in a shipping container. Improperly installed or designed windows can lead to heat gain or loss, increased energy consumption, and potential condensation issues. Conversely, well-placed and appropriately sized windows can improve natural light, ventilation, and potentially reduce your reliance on artificial climate control.
Do windows affect the structural integrity of a shipping container?
Yes, windows can affect the structural integrity of a shipping container, especially if they are not installed properly. Cutting into the container to add windows can weaken its overall strength, particularly if the openings are not reinforced.
To maintain structural integrity, reinforcement with steel frames or extra bracing may be necessary, depending on where you’re installing your window. Regular maintenance can also help to ensure long-term security and durability. Windows that are installed correctly in a shipping container are less likely to affect structural soundness.
Are shipping container windows secure?
While windows can make a shipping container slightly less secure, you can make sure your windows themselves are more secure. By choosing more secure window types and incorporating security features, you can add to the overall security of your container. You can increase the security of your windows with reinforced locks, shatter-resistant glass, security bars, shutters, and roll-down covers.
Can you ship a container with a window?
Yes, shipping containers can be shipped with windows. This is often the case if you have a shipping container converted or modified before delivery. Windows made of polycarbonate or with steel frames are suitable for shipping as they are. However, windows with glass will need adequate protection during transportation to prevent damage.
Where can I get windows for my shipping container?
Universal Containers offers shipping container windows in a variety of types. You can install them yourself, or let us help you with container modification if you choose to go down this route.