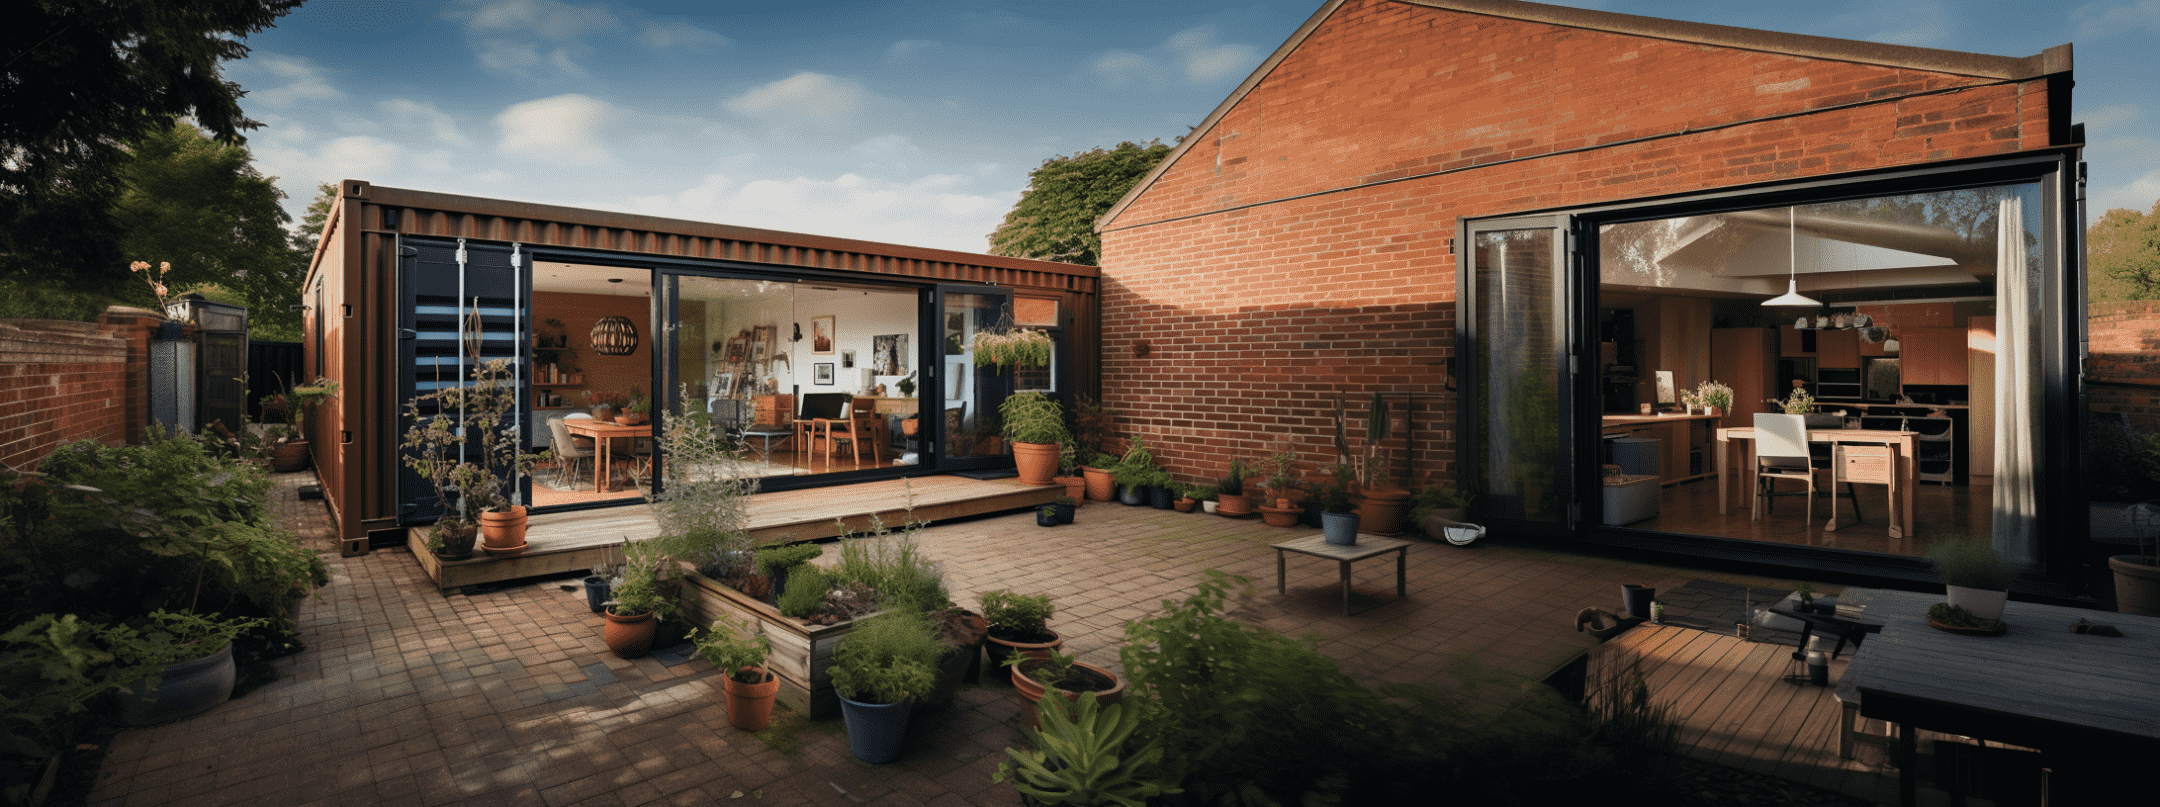
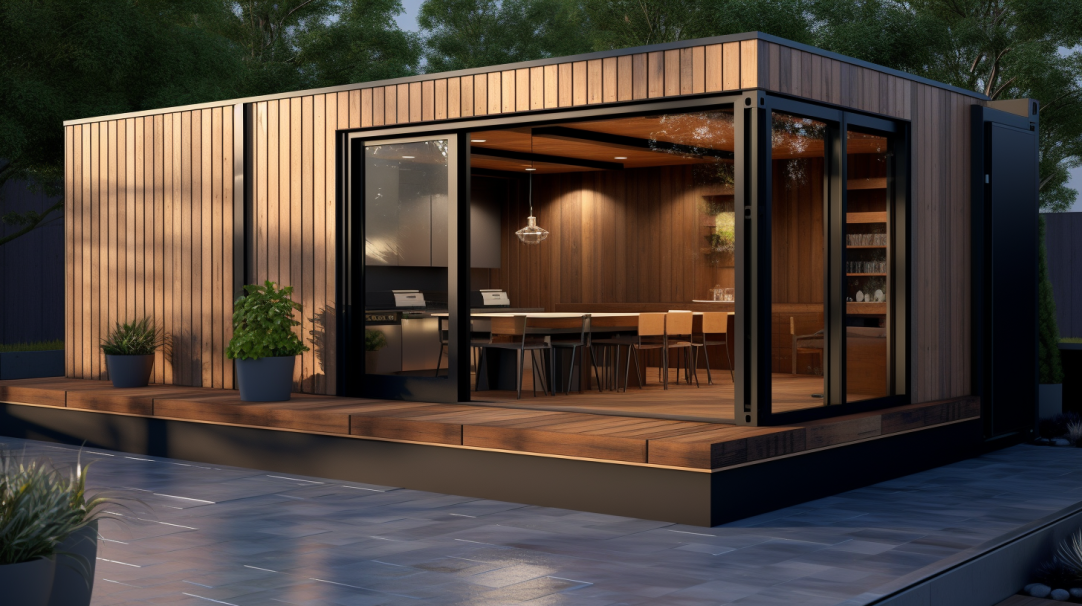
Cladding a shipping container is important to add an extra layer of insulation, while also giving your container an eye-catching and aesthetically-pleasing look.
The cladding process involves covering the exterior of a shipping container with another material, such as timber or brick slips. Whether you buy a container brand new or used, cladding can completely transform your unit, making it unrecognisable in terms of its original use as a means to transport goods.
In this article, we will discuss the key reasons why you would clad a shipping container, the benefits, how to do it, the costs, the different types of cladding, and more.
Why clad a container?
Improving the overall appearance of a shipping container is the key reason for installing cladding, effectively disguising the unit so it can be repurposed as a residential or commercial property. Painting the container is a cheaper alternative but this will not hide the fact that the container is built from corrugated metal, and the unit’s initial use will still be apparent.
Installing cladding is also a quick process and is a very cost-effective way of giving your unit a makeover.
However, aesthetics is not the only reason for installing cladding, it can also provide an extra layer of insulation that minimises any heat transfer to the metal substrate, meaning a cladded container is cooler in summer and cosier in winter.
What types of cladding can I use?
Wood, brick, and steel are popular forms of cladding, but almost any type of surface can cover the exterior of a shipping container, ensuring it is durable and water-proof.

There is a wide range of materials that can be used to clad a shipping container which may include:
- Timber Cladding – A very popular choice of shipping container cladding is timber, providing a clean and natural look to the exterior of the unit. This Scandinavian style is weather-resistant and provides great insulation.
- Brushed Steel – A more modern alternative is brushed steel, with sheets of brushed steel being one of the more budget-friendly options for shipping container cladding.
- Brick Slips – Brick slips are thin strips of brick that give the unit the effect of a regular building that has been constructed using traditional methods.
- Composite Cladding – This type of cladding is very low-maintenance and durable, while also offering a more modern look to timber or brick.
Looking for professional cladding solutions for your container?
We specialise in transforming containers with expertly applied, long-lasting cladding in the material of your choice!
View cladding servicesHow to clad a shipping container
Cladding a shipping container is a relatively straightforward process if you have the correct materials and equipment. For achieving the best results you’ll have to know some basics, such as what you will need, how to prepare the shipping container, and the steps that need to be completed.
What you’ll need:
- Domino clamps
- Plywood adapters
- Hand or circular saw
- Tape measure
- Marker
- Allen keys
- Drill driver
- 2in x 8in x 8ft timber
- 2in x 4in x 4ft timber
- Cladding
- 4mm pilot drill bit
- 70mm wood screws
- 90mm screws
- 50mm screws for cladding
Preparing your container
Before cladding your shipping container, there are a few necessary preparations that need to be made.
First, ensure your container is positioned on a flat and solid surface so it firmly stays in place during the work. Then, give the exterior walls a thorough clean, removing any dirt, grease, or debris that could cause issues when the cladding is in place.
Once this is done, attach a domino clamp to each face of the shipping container that is going to be fitted with cladding (two sides and one end), then attach plywood adapters to each clamp.
Cladding your shipping container
Once the necessary preparations have been completed it is time to start cladding the shipping container. Below is a step-by-step guide on how to clad a shipping container correctly.
- To commence, trim the timber rails to the appropriate dimensions, which require two lengths (2in x 4in and 8in x 2in) matching the container’s length. The thickness of the 8in x 2in timbers typically spans 47mm, in addition to the Domino Clamp and plywood adapter’s thickness, resulting in an approximate overhang of 101mm.
- Next, connect the 2in x 4in and 2in x 8in timber to form an L-shape by utilising 90mm screws. Begin by drilling pilot holes along the back edge of the 2in x 8in timber using a 4mm pilot drill bit. Ensure that there is a hole every 600mm.
- First, position the rails starting with the lower rail. Ensure that the 4in x 2in rail is at the bottom, snug against the two plywood adapters. The top 8in x 4in rail should align perfectly with the door side of the shipping container, making sure not to exceed the 101mm overhang.
- Secure the lower rails by carefully driving in the 70mm wood screws (typically four) into the pre-drilled pilot holes. Attach each end of the lower rail to the plywood adapter on the shipping container, taking care to avoid contact with the M12 screws that hold the plywood adapter to the domino clamp.
- After securing the lower rails, it’s time to proceed with the upper rails, which essentially involves repeating the previous step. Take care to ensure that the upper rails align seamlessly with the container roof, with the 4in x 2in rail at the top edge, and that both rails are parallel to each other. This meticulous attention to detail will ensure a well-crafted and structurally sound framework.
- After securely attaching the rails, proceed to measure and cut the studs. Begin by measuring the distance between the top and bottom rails, and then carefully cut twelve studs to perfectly fit this space.
- To secure the studs, it is important to drill the screws diagonally, ensuring they go through both the stud and the rail. This ensures a sturdy and secure connection between the two.
- After securely fastening the studs, proceed to create notches in the 2in x 8in timber rails. These notches should be positioned approximately 1ft from the top and be of a width that allows the smooth sliding of the 2in x 4in rails.
- Position the studs at a distance of 2 feet apart (adjust based on the shipping container’s size), snugly within the container’s grooves. Securely fasten them onto the top and bottom rails using screws.
- Cut a piece of timber measuring 2 inches by 4 inches. Ensure that its length matches that of the container, and securely attach it to the pre-existing notches using screws.
- Position blocks between each stud, staggering them for effortless drilling at both ends. This technique ensures optimal convenience and efficiency.
- Repeat the aforementioned process for each side of the shipping container. When finished, the container is primed for cladding with your specifically measured material.
Benefits of cladding a shipping container
There are many benefits to cladding a shipping container, making it a popular choice for those looking to repurpose these durable structures for various uses. Cladding not only enhances the aesthetic appeal of a shipping container, allowing for creative and customised designs, but it also significantly improves its insulation properties.
Offers an alternative to metal surfaces
Regardless of the shipping container’s new purpose, whether it is to be lived in, used as an office, storage, or any other function, you may be keen to hide its corrugated metal exterior. As mentioned earlier, wood is a common choice due to its natural finish, while it is also one of the most convenient options due to how easy it is to fit. Whatever material you choose, cladding is the best way to hide the original appearance of the unit.
More choice of design and aesthetics
Cladding gives a shipping container more flexibility. Shipping container homes are becoming a popular trend due to their easy-to-predict costs, easy installation, and small size. However, many people who own a shipping container home are keen to disguise its original form.
Cladding ensures owners of a shipping container have a wider choice of design options, allowing them to install new textures, colours, and shapes on the exterior of the unit to give it a brand new look.
Looks better than painting
Painting your shipping container is the easiest way to give it a new look, however, the corrugated steel is still instantly recognisable, marking your building as a former shipping container. Cladding is the only way to completely hide the unit’s former function and looks much more attractive.
Looking for paint for you shipping container?
Check out our selection of shipping container paint in any RAL colour you need!
View productsOffers a new way to insulate
Cladding is an additional form of insulation that helps to turn a steel box into a functional building. Insulating the shipping container is a key requirement as the steel will heat up on hot days and retain the cold in the winter months, making the unit unfit use for occupation.
Cheaper than prefabrication
Prefabs are an alternative to cladding to give a shipping container a new aesthetic but this option can come at a considerable cost. Purchasing a prefabricated shipping container can be very expensive when compared to cladding. Therefore, it is the recommended route for anyone working on a strict budget.
How much does cladding cost?
Shipping container cladding is a generally cost-effective option and is the ideal choice for anyone who feels a prefabricated shipping container is too expensive. That being said, the cost of cladding a shipping container will be dependent on a number of factors such as:
- The size of the shipping container
- The type of material being used for cladding
- Price fluctuations at the time of purchase
- Seasonal demand
In terms of materials, timber cedar can cost in the region of £165 per m², while aluminium panels can cost around £215 per m².
When calculating costs, it is recommended to factor in at least an additional 8% of the shipping container’s overall area to account for any potential waste. You also need to consider the equipment that is needed to install the cost and materials such as timber, screws, and studs.
Using a professional service to install the cladding can often work out cheaper, as professional tradesmen can use their contacts to source more affordable materials, they will already have the necessary equipment, and their experience can help to limit waste.
The bottom line
Cladding is the ideal way to transform your shipping container to make its exterior more aesthetically pleasing and is much more affordable than purchasing a prefabricated unit. Cladding materials can vary, from timber cedar to brushed steel or brick slips. Your choice of material will impact the overall cost.
As well as looking great, shipping container cladding also provides an extra layer of insulation, vital for regulating the temperature of your converted shipping container.
Looking to buy a shipping container? Check out our wide range of new shipping containers or for a more budget friendly option we also stock a variety of used shipping containers. Secure your ideal container today!
Looking for a completely custom solution?
We have a wide range of base containers that can be customised to your needs, however we
realise
that
sometimes you need something completely ‘Outside the box’.
Contact us and one of our experts will be in touch to help design the container of your
dreams